This tutorial covers carving simple curls. There are many different methods one can use to carve their Hitty’s curls and I encourage you to experiment as you carve so that you can create your own special version of curls for your Hitty.
This tutorial explains how to make simple “grid pattern” curls, where all curls are neatly in line in rows going up and down, and side to side. I have carved curls where they were placed random for a more “natural” look, and I have carved curls so tiny that one could barely see them. Of course when using a dremel, one can only do so much. Very tiny curls and random curls are very hard to achieve with power carving, but can be carved with a good carving knife.
To begin, first you’ll need to do some sanding on your Hitty’s head. The areas shown in the photo below will need to be sanded to a fine finish. If you do not sand the head now, before you begin carving, then you’ll end up with a “very fuzzy headed” Hitty.
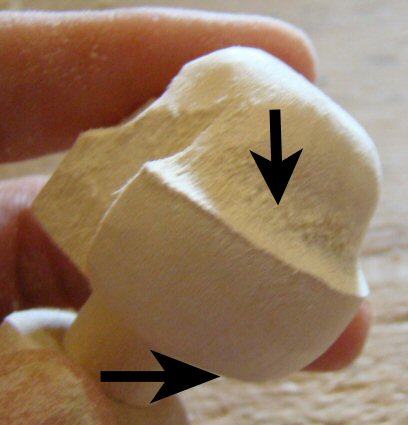
First sand the underside of the hair area using your fine barrel sander.

Next, you will want to use the bit shown in the photo below to sand the upper side of the curls.

Here’s the upper side of the curls, sanded to an almost smooth finish with the specified bit.

Now using the same bit, sand the sides back at a slight angle so that the side of the hair no longer looks like a “step”. It should go backwards at an angle more like a “slide”.
Once the angle is sanded, you will want to gently sand down the sharp edge as shown by the arrow in the photo below.

Here’s your head once it’s been sanded with your bits. Next, sand by hand with 300 grit or finer sandpaper until it has a super smooth finish.

Notice in the photo below how the sides of the hair “angle” backwards.
Next you will carve the part on the top of the head. Draw a line with pencil, in the center of the top of the head.

You’ll be using this cutter bit to carve the part, and the curls, so keep it handy!

Now holding the bit at an angle, cut the parting line. You’ll be cutting with the edge of the cutter to cut this area and the curls, where your cuts will be “V”shaped.

Next, carve off the sharp edges to blend the parting line into the head.

Here’s the parting line once completed, notice how it rounds smoothly on top of the head, yet has the V in the center.
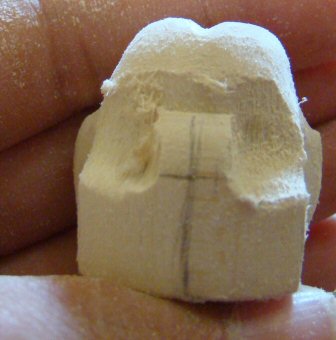
Next, looking from the top, mark lines on top of the curls, measuring to be sure that they are of the same distance.

Draw the lines down the back of the head, and under. You’ll be cutting directly on top of these lines once you begin carving the curls.

Next mark lines on the sides to mark where the side rows will be. With a dremel I can usually get 4 or 5 rows of curls, although when I first started carving, I was only able to get 3 rows. If you find 4 rows difficult, carve three until you get better used to your dremel.

Next draw your side lines around the back of the head, to the other side.

Bring the lines around the other side, then look at your Hitty with face forward to be sure the lines match on both sides.

Now using your cutter, carve the rows that go from top to bottom. In the photo below, you can see how the cuts should look. You do not want to carve too deep, but you do wish to carve deep enough where your curls will stand out well after sanding the sharp edges away.
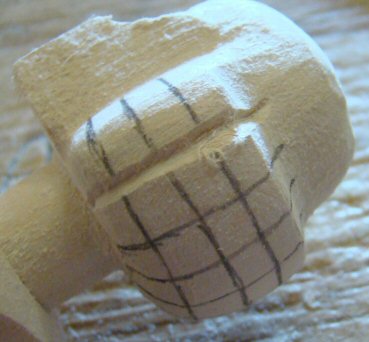
Here’s how the curls should look once all the rows are carved.

Next, you’ll want to use your fine diamond bit to sand away the sharp edges of the curls. This will “round” the curls to a more natural look. If you do not have this bit, you can use the orange sander shown in the photo at the beginning of this tutorial to sand away the sharp edges, but it’ll remove more wood and although your curls will still be lovely, they will not be as “crisp” as they would be when using this smaller bit.

Using the sander, sand the sharp edges to round off the edges of the rows.

Here’s the rows once rounded, notice that the side lines can still be viewed. Do not round so much that you sand away the pencil lines completely.

Next you will need to carve the side lines. You can carve them in a straight line, or if you’re comfortable using your dremel, you can carve “curves” as shown in the photo below, to create more natural looking curls. I recommend beginners carve a straight line side to side, as was done previously in the rows going up and down, until one becomes more comfortable with their dremel.

Here I am carving the side rows with tiny little curves. To carve these curves, one should cut a V by touching the left of the curl at an angle, the the right of the curl at an angle. Once you have cut the V pattern, touch the sharp part of the V to round it off. Each individual curl is cut with 3 separate cuts.

Here’s the curls once completed.

Here’s one side of my Hitty’s head showing how the side curls should look. remember, if you carved in a straight line, the sides will look somewhat different, but similar to mine.

Here’s a photo of the other side of Hitty’s head. I could not get a good frontal shot to show that the rows match when looking at the face, but you want to be sure that both sides match evenly in distance when you mark them with your pencil.
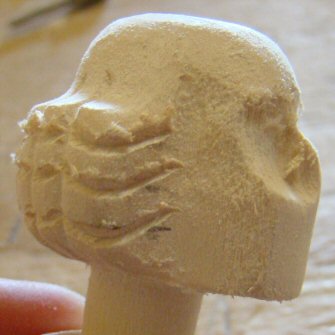
Now using your tiny diamond bit again, sand away the sharp edges of your curls.

Here’s the curls once the edges have been sanded down. At this point you can clean up any “fuzzies” by gently sanding by hand with 300 grit or finer sandpaper.

The original Hitty has carvings on the top of her head to look like hair lines, you can carve a few lines as shown in the photo below, to get the same look, or you can leave the top bare and smooth.
