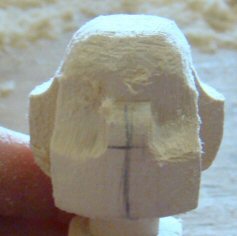
Now that you’ve completed your Hitty’s arms and legs, it’s time to work on helping her personality emerge! The arms and legs were basic rounding and shaping, with very little detail. The next few tutorials are a bit more complex, because you’ll be carving more detail rather than basic shaping as you did with the arms and legs.
This tutorial explains how to separate the face from hair at the top of your turned blank. If you have not ordered a turned blank yet, click here to contact me about how to acquire one.
If this is your first time carving a Hitty, I want to encourage you to not give up if you are disappointed with your results. It takes time and patience to carve a Hitty, especially when it comes to carving the face and hair. With practice, your carving skills will improve over time as you carve more and more Hittys.
To begin this lesson, you will first want to mark the center of your Hitty’s head. To make this easier, place the arms and legs temporarily on your Hitty so that you can lie her flat as you measure to find the center of her face.
In the photo below, you can see how I hold my ruler to find the center. I place it right below the head, on the flat plane, find the center, and place a tiny mark.

Once you have found your center, draw a line up the face, then with arms and legs still placed on your Hitty, “Eyeball” the line to be sure that it is centered. This is extremely important, if not centered, then your Hitty will look like her head is turned slightly. This can be fixed by carving away more of one side of the face, but fixing errors can be very difficult, so it’s best to be sure you have your center line before you start your carving.
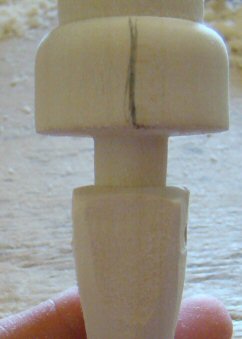
Once you have your line centered, you will want to measure the sides of the face. I like to make my face 1 inch wide, so I can carve away extra to fix any flaws. First mark from center to one side, 1/2″ over. Then mark 1/2″ over on the opposite side.
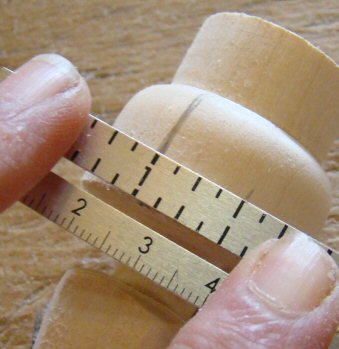
Here’s what my markings look like once completed.
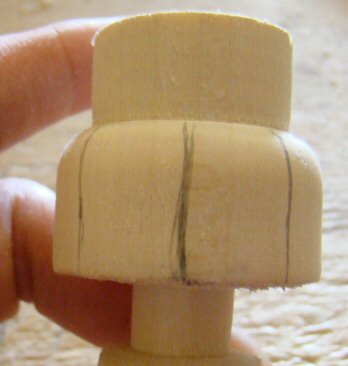
Next, using your rough cutter, you will want to carve a straight line up the head, to begin separating the face from the head. Hold your cutter as shown in the illustration in the photo below.
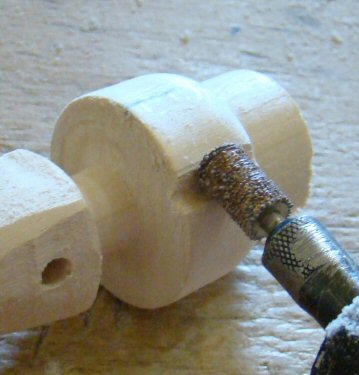
Gently carve the face sides alternating sides to keep them even, until you’ve reached right before the middle of the neck. Here’s a photo of what your head should look like from the front.
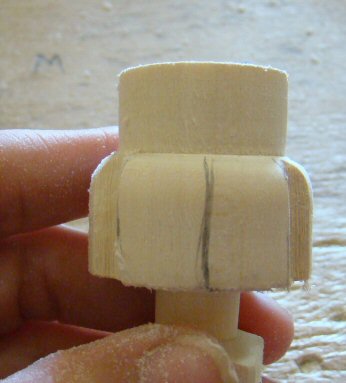
Here’s a photo to show what the head should look like from the bottom.
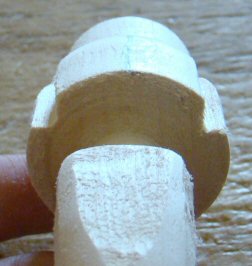
And here’s a photo to show what the head should look like from the side. Notice I stop carving right at the center of the neck.
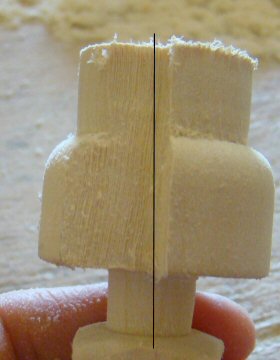
Next, place your legs on your Hitty and measure her. You will want to carve the top of the head away, until she stands between 6 1/4″ and 6 3/8″ tall. Here my Hitty stands right before 6 1/2″ tall, so I need to carve away the excess.
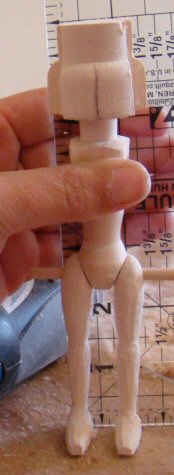
To do this, I hold the Hitty on the table, and carve downward on top of the head, as I did for Hitty’s feet.
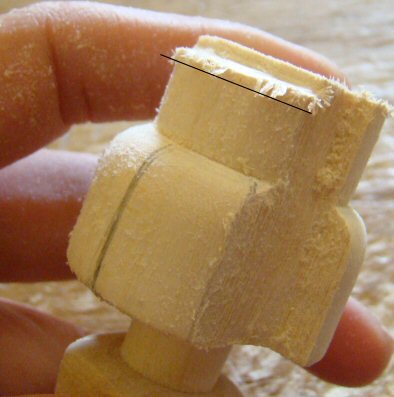
Here’s the head once carved down to the proper size.
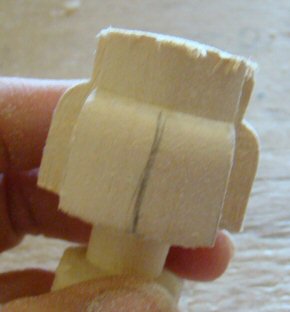
Next you’ll need to round the top of the head, as shown in the photo below. Round the top corner all the way around your Hitty’s head.
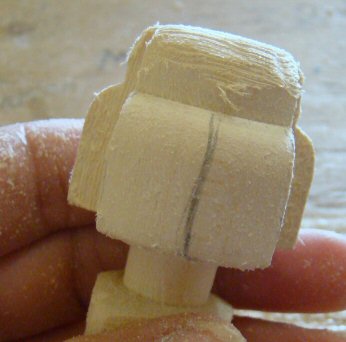
The temples will need to flow smoothly from forehead to head, so you’ll next want to cut the temple area as shown in the photo below, at an angle to help the two area blend better. Sanding later will help them blend more.
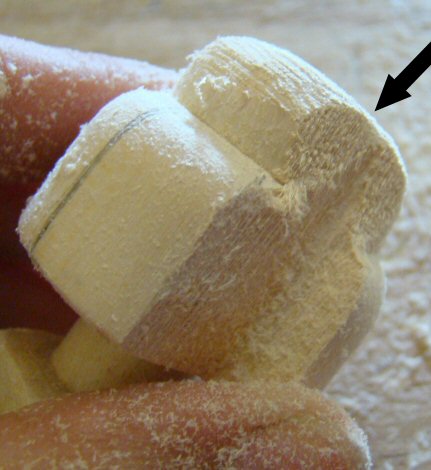
Here’s the Hitty once both sides of the temple have been carved at angles so that they meet the head smoothly.
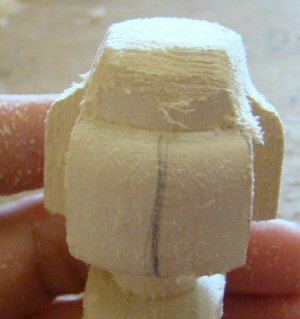
Next you will want to round off the bottom of the hair. Do not round the bottom of the face yet, just the hair line as shown in the photo below.
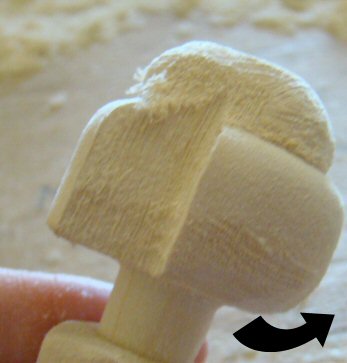
Now that you have the top of your head, temples and bottom of the hairline shaped, you’ll want to mark where your eyes will be. The eye placement is completely up to you, I like to mark at the halfway mark, some prefer eyes to be above the halfway mark.
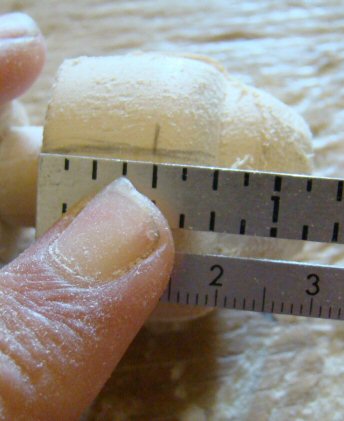
Once your eye line is marked, you can either skip this next step, it’s optional, or you can shape the top of the curl line by running your cutter around it to give it more curve. When I am carving a Hitty, I sometimes curl this area, and sometimes I simply leave it as it is.
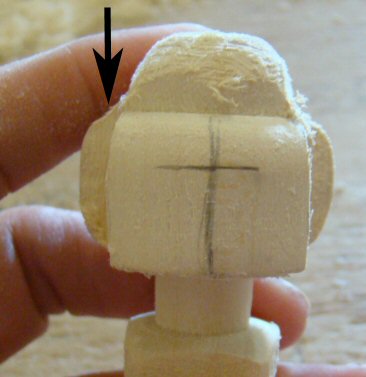
Here’s a photo showing the area once curled. Notice I did not carve the top fo the head, I simply carved the top of the curl area, by placing my cutter at an angle and running the rounded area of my cutter all around the head.
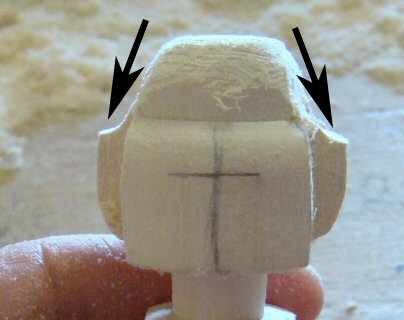
Next we will make the impression for Hitty’s eye sockets. Do this by cutting at the eye mark, having your cutter centered with the eye mark as shown in the photo below. Notice that the cut does not go all the way to the center, you need to leave wood between the sockets to form into the bridge of the nose later.
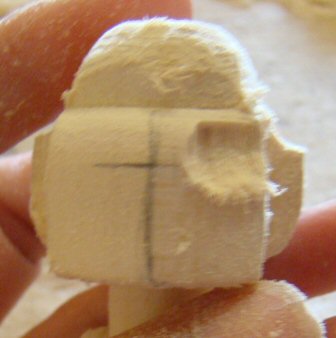
Next gently carve away the wood ledge above the socket, so that the socket flows smoothly into the forehead as shown in the photo below.
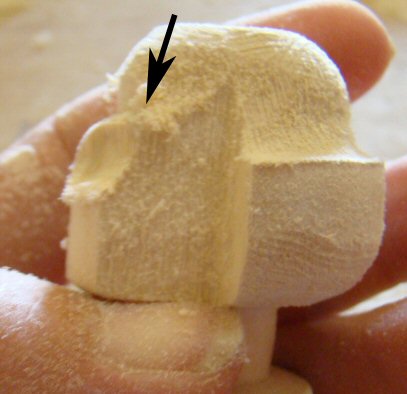
Here’s the Hitty once the sockets have been completed. You have a basic canvas to work with now, where face and hair areas are now separated. In the next tutorial we will begin shaping the hair.